CI/CD with Xcode Cloud
Update, October 2026: the screenshots below show Xcode 14.3. One thing has changed since this was written: the free tier did not turn into a paid one. 25 compute hours a month are now included with the Apple Developer Program membership.
Xcode Cloud is a relatively new service that Apple introduced at WWDC 2021. Think of it as an alternative to Fastlane that is deeply integrated into the Apple ecosystem and Xcode. It is fully cloud-based and runs on Apple’s servers.
Xcode Cloud is built around two concepts: workflows and compute hours.
- A workflow is a set of instructions, a sequence of actions the system runs when a trigger fires: a schedule, a commit to a certain branch, a new tag and so on.
- Compute hours are the time Xcode Cloud spends running your workflows. How many hours you get depends on your plan. According to Apple, the system tries to run tasks in parallel to save hours.
These were the Xcode Cloud plans at the time:
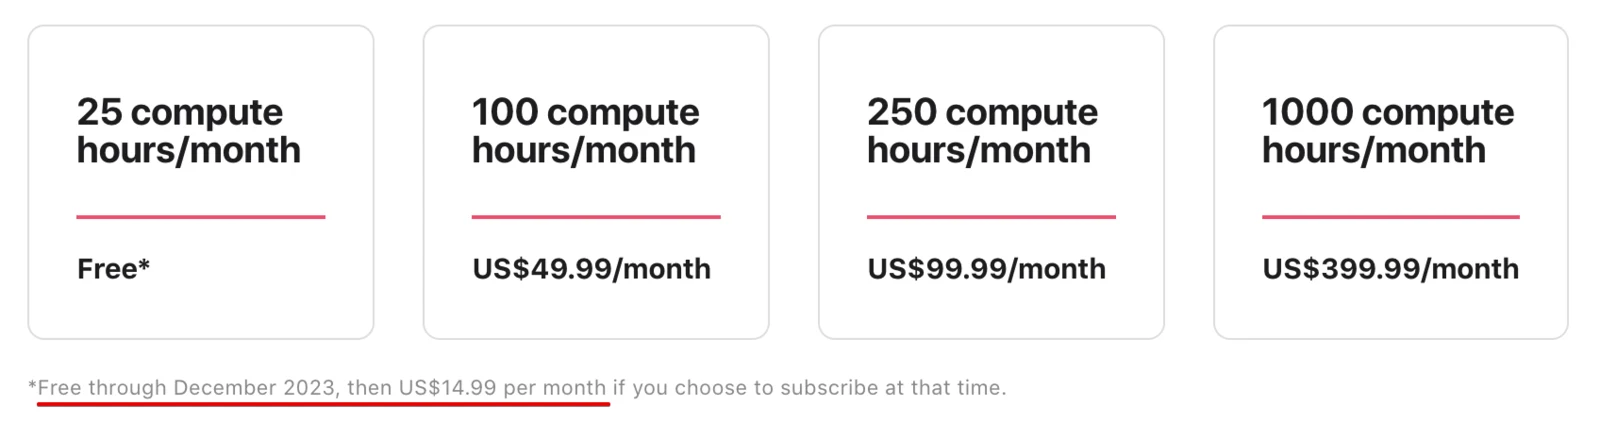
As you can see, the free plan was announced as free only until the end of 2023, after which it was supposed to cost $14.99 a month. In the end Apple kept it free for Apple Developer Program members (see the note above).
You can use Xcode Cloud to build your app and run tests, as well as to analyze builds. It also integrates with App Store Connect and TestFlight, so it can send a new version to your testers or submit the app to the App Store.
Xcode Cloud can also send email notifications about workflow results, and it integrates with Slack.
It is important to note that Xcode Cloud runs everything in an isolated environment. It doesn’t keep your source code or your environment setup between builds. This means that if your project uses CocoaPods, XcodeGen, SwiftLint or any other third-party tools, you’ll have to install them before every build with a custom post-clone script.
The only things Xcode Cloud keeps are the results of your workflows: build and test reports, UI test screenshots and archives with app or framework artifacts.
Artifacts are stored on the server for 30 days and then deleted. Don’t forget to download them for a local backup, especially for the app versions you shipped to the App Store.
Requirements
To use Xcode Cloud (XC from here on), your setup has to meet a few requirements.
- You need an active Apple Developer Program membership.
- Your account must be added in Xcode settings, under Accounts.
- Your app needs a record in App Store Connect (unless you are building a framework). To create one, you need at least the App Manager role.
- The project or workspace file has to be consistent, meaning it should always exist. In practice XC can generate a project or workspace with Homebrew tools and a post-clone script, but the project or workspace file must exist for the initial setup, and you have to do that setup in Xcode, not in App Store Connect.
- The project must have at least one scheme that builds a target.
- That scheme must have the Archive action enabled. XC only works with schemes that have the Archive checkbox checked.
- The project must use the new build system (select New Build System in the project or workspace settings).
- All sources, dependencies and extra build tools must be accessible to XC. In other words, you’ll have to give XC access to every private repository your project uses.
- Automatic code signing must be turned on.
- The app’s bundle ID must be set on the Signing & Capabilities tab. If you use custom
.xcconfigfiles to swap bundle IDs, there are a few extra steps, described in this article.
These source control providers are supported:
- Bitbucket Cloud / Bitbucket Server
- GitHub / GitHub Enterprise
- GitLab / self-managed GitLab
If you host the server yourself, you have to allow incoming HTTPS traffic from these address ranges: 17.58.0.0/18, 17.58.192.0/18 and 57.103.0.0/22.
You’ll also have to give XC access to your repositories. With GitHub, this means installing a special Apple app on GitHub and connecting it to the repositories in your account.
Setting up Xcode Cloud for a real project
Let’s set up XC for a real project. I’ll use a working app hosted in a public GitHub repository, with the main app target and a test target.
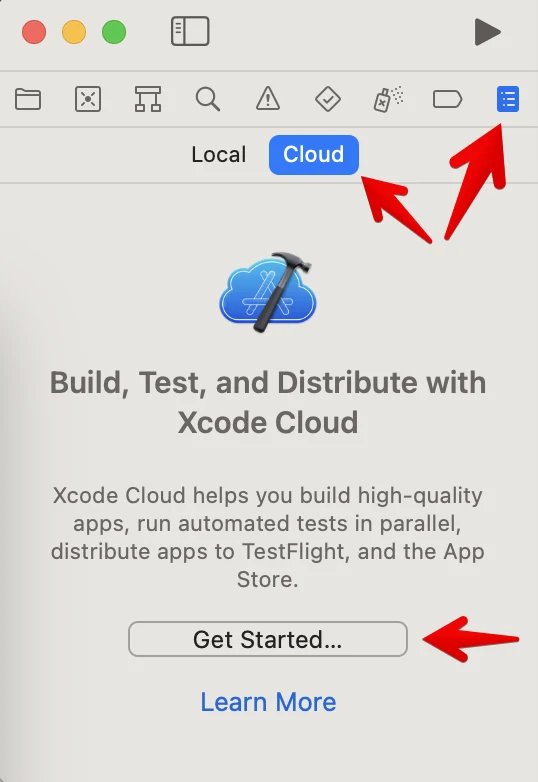
Open the project, go to the Report Navigator, select the Cloud tab and click Get Started.
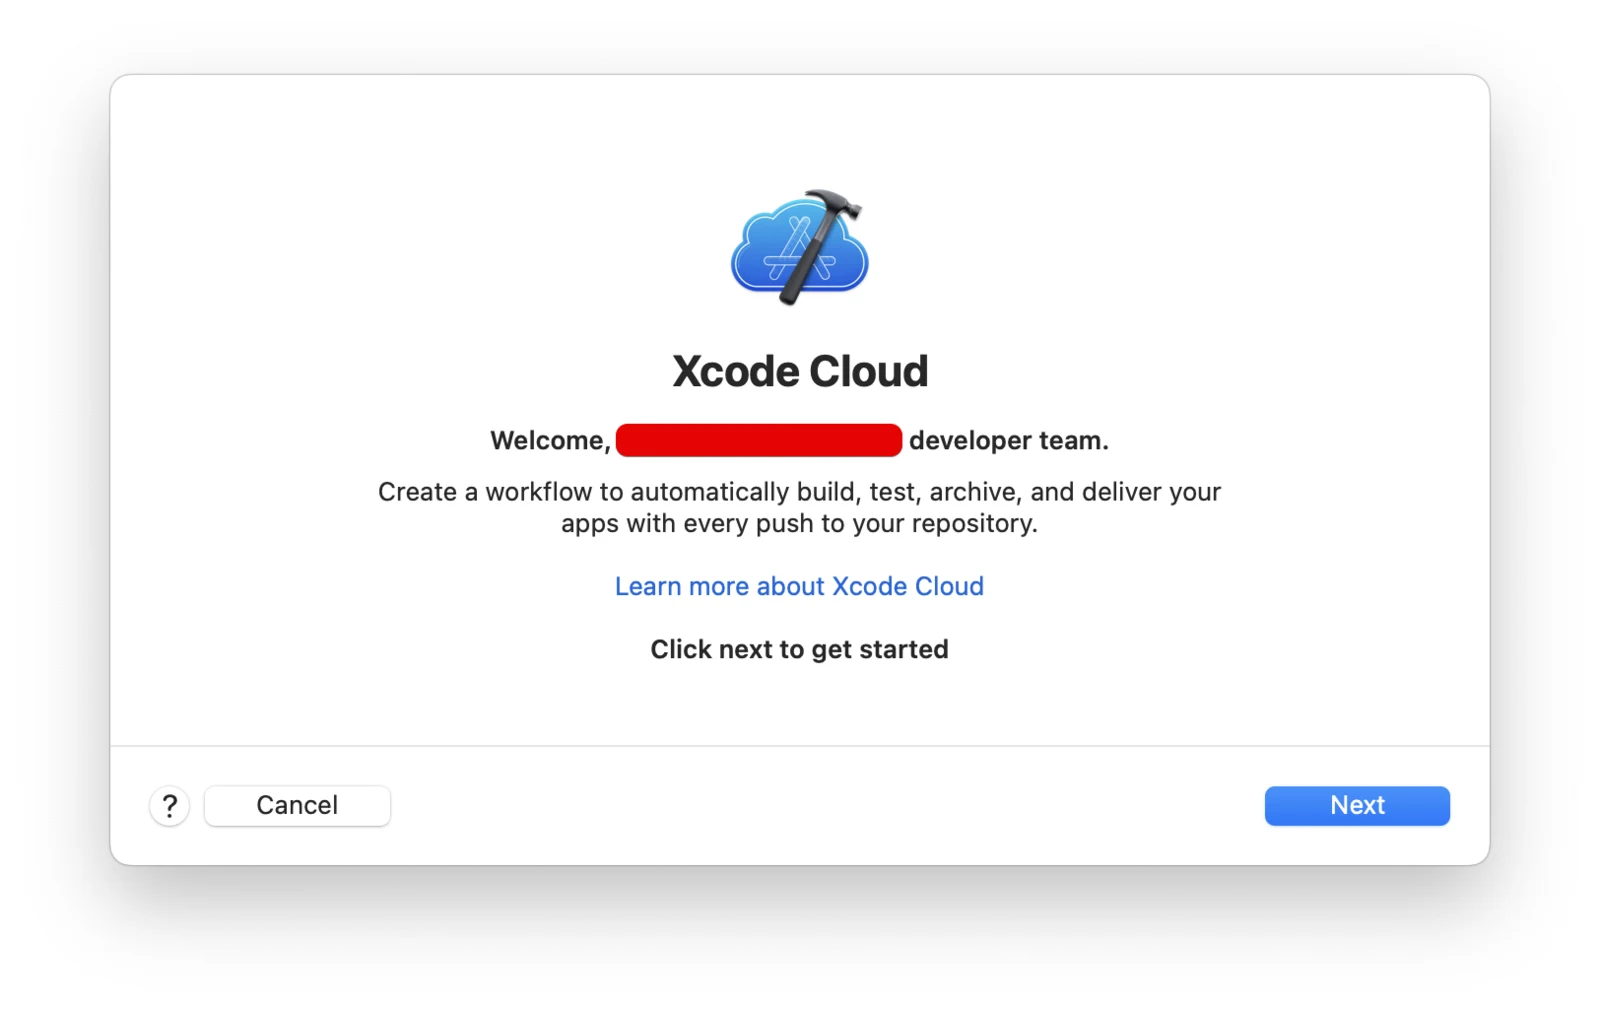
On the welcome screen, click Next.
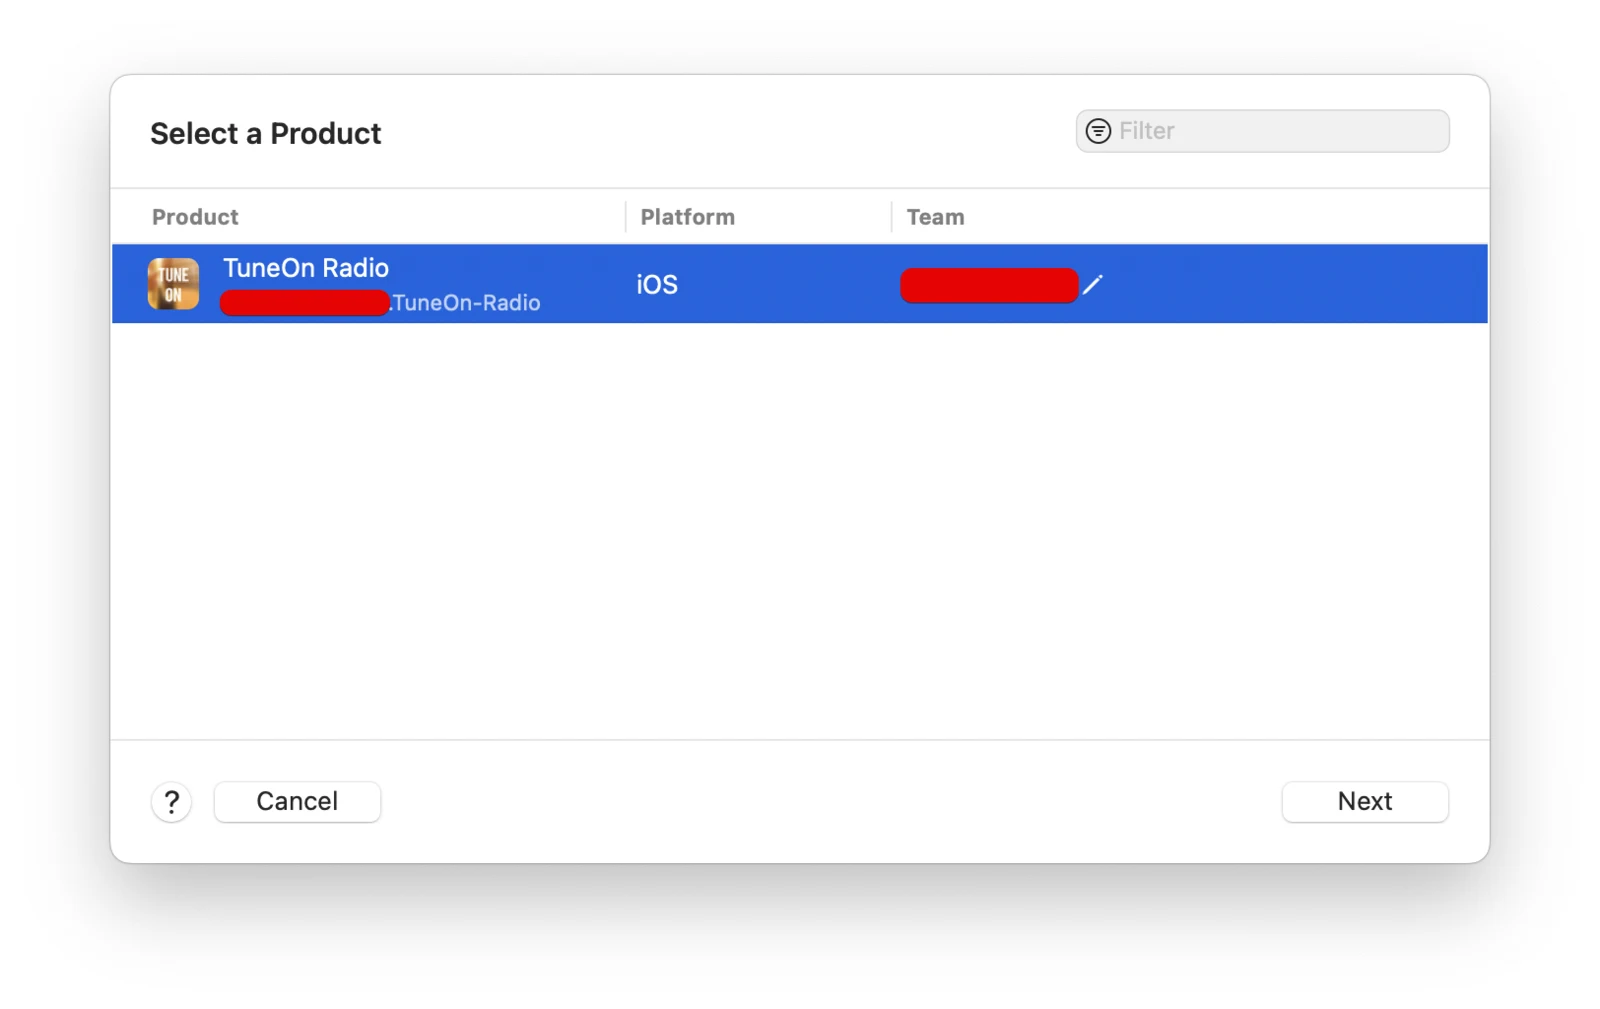
Then choose the product you want XC to build.
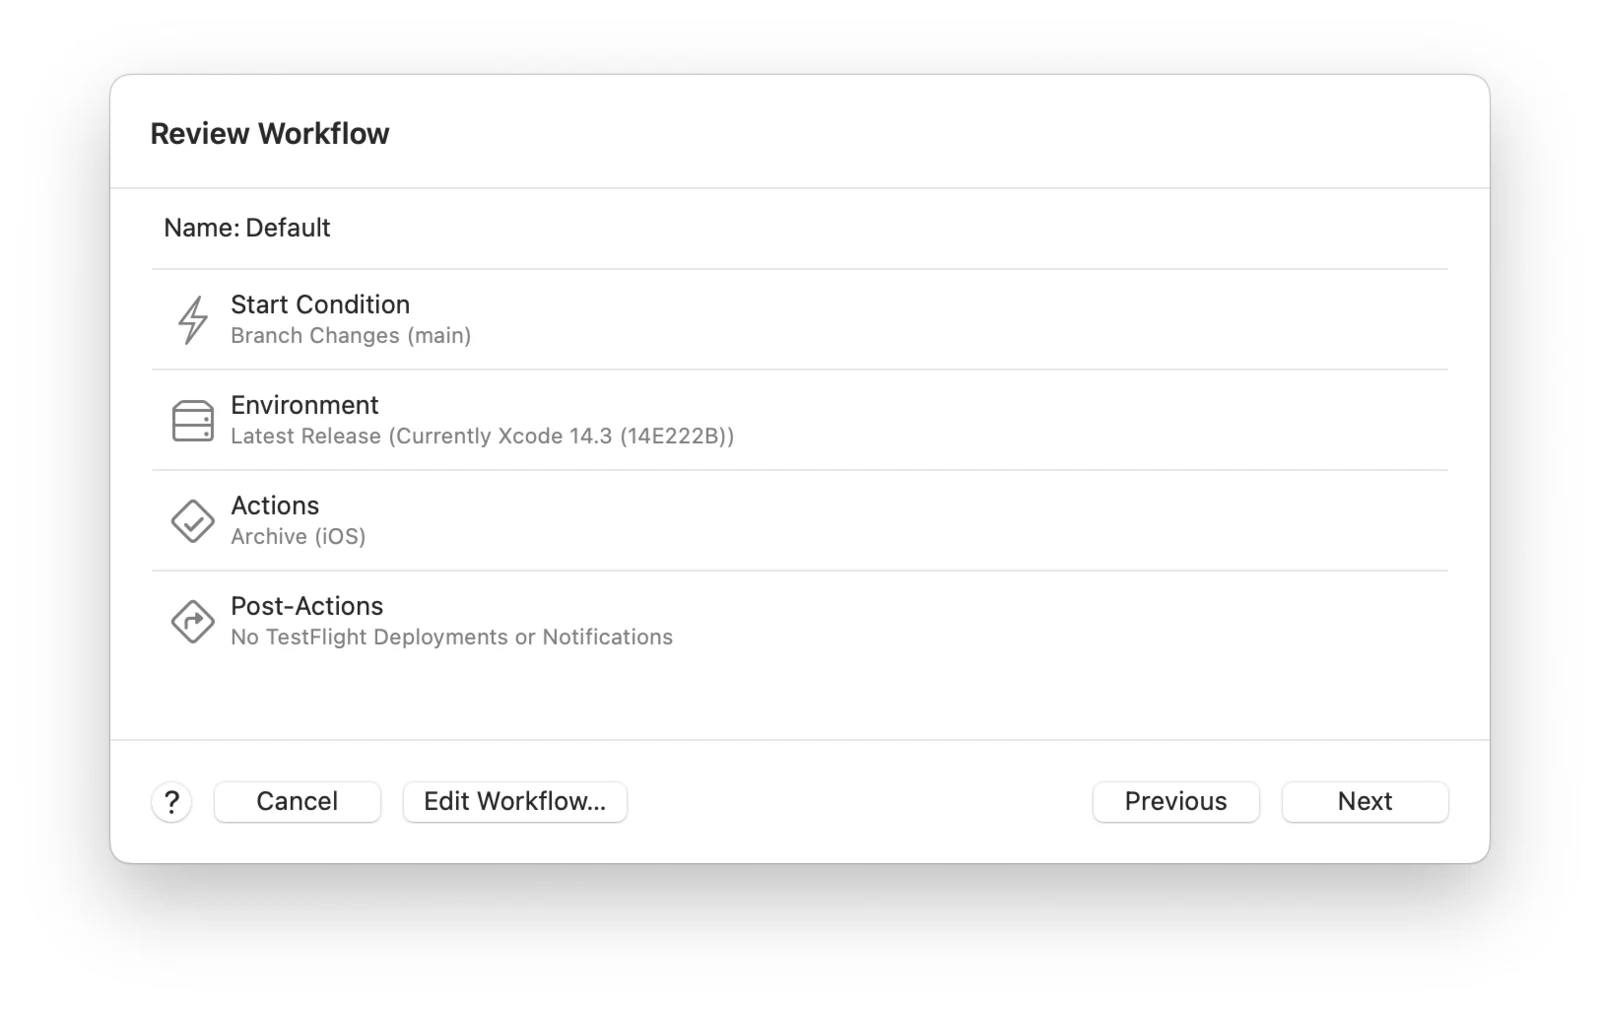
Next, Xcode suggests creating a workflow with the default settings: build the project on every new commit to the main branch, for iOS, with the latest release version of Xcode.
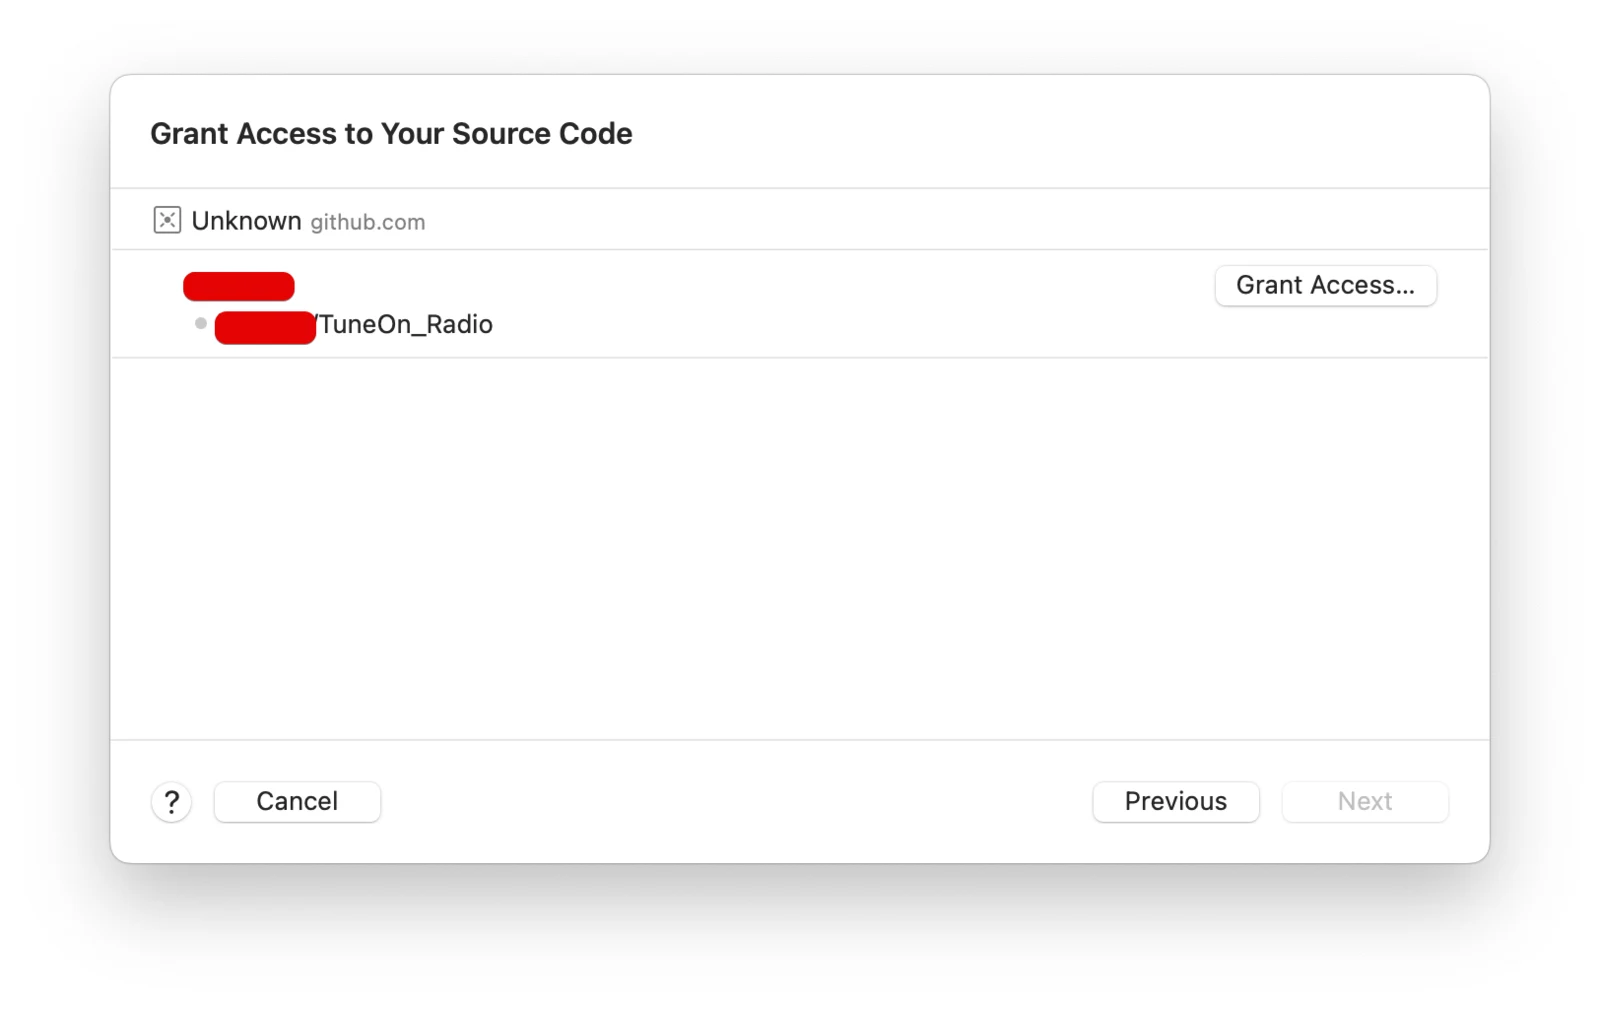
Now XC needs access to the GitHub repository. Click Grant Access.
You’ll be redirected to App Store Connect in your browser, where you’re asked to link your Apple ID with your GitHub account.
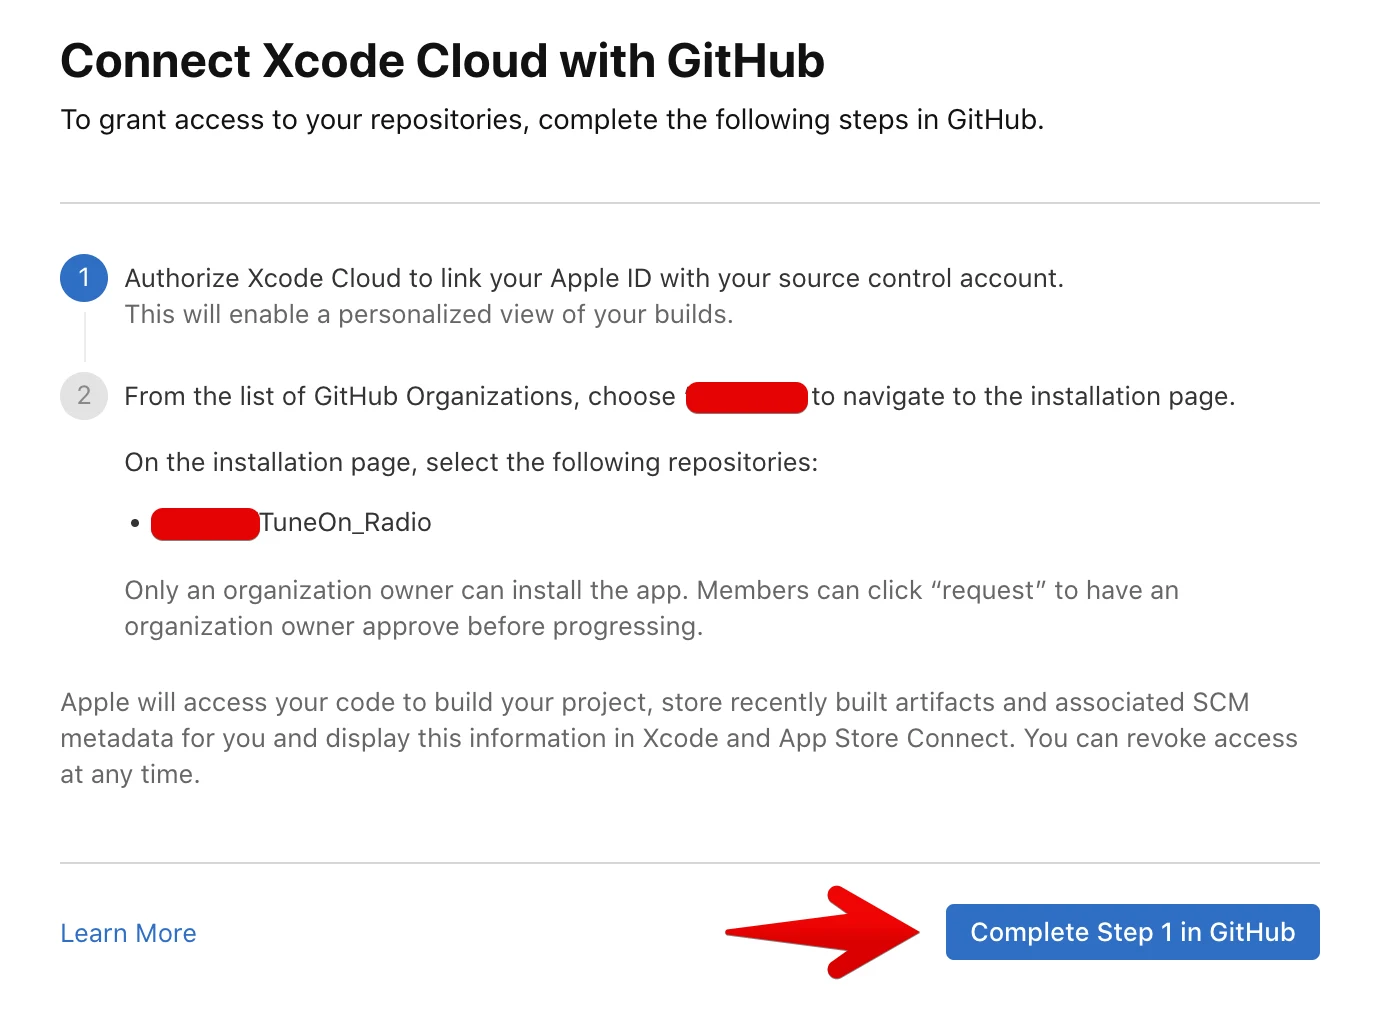
Click Complete Step 1 in GitHub.
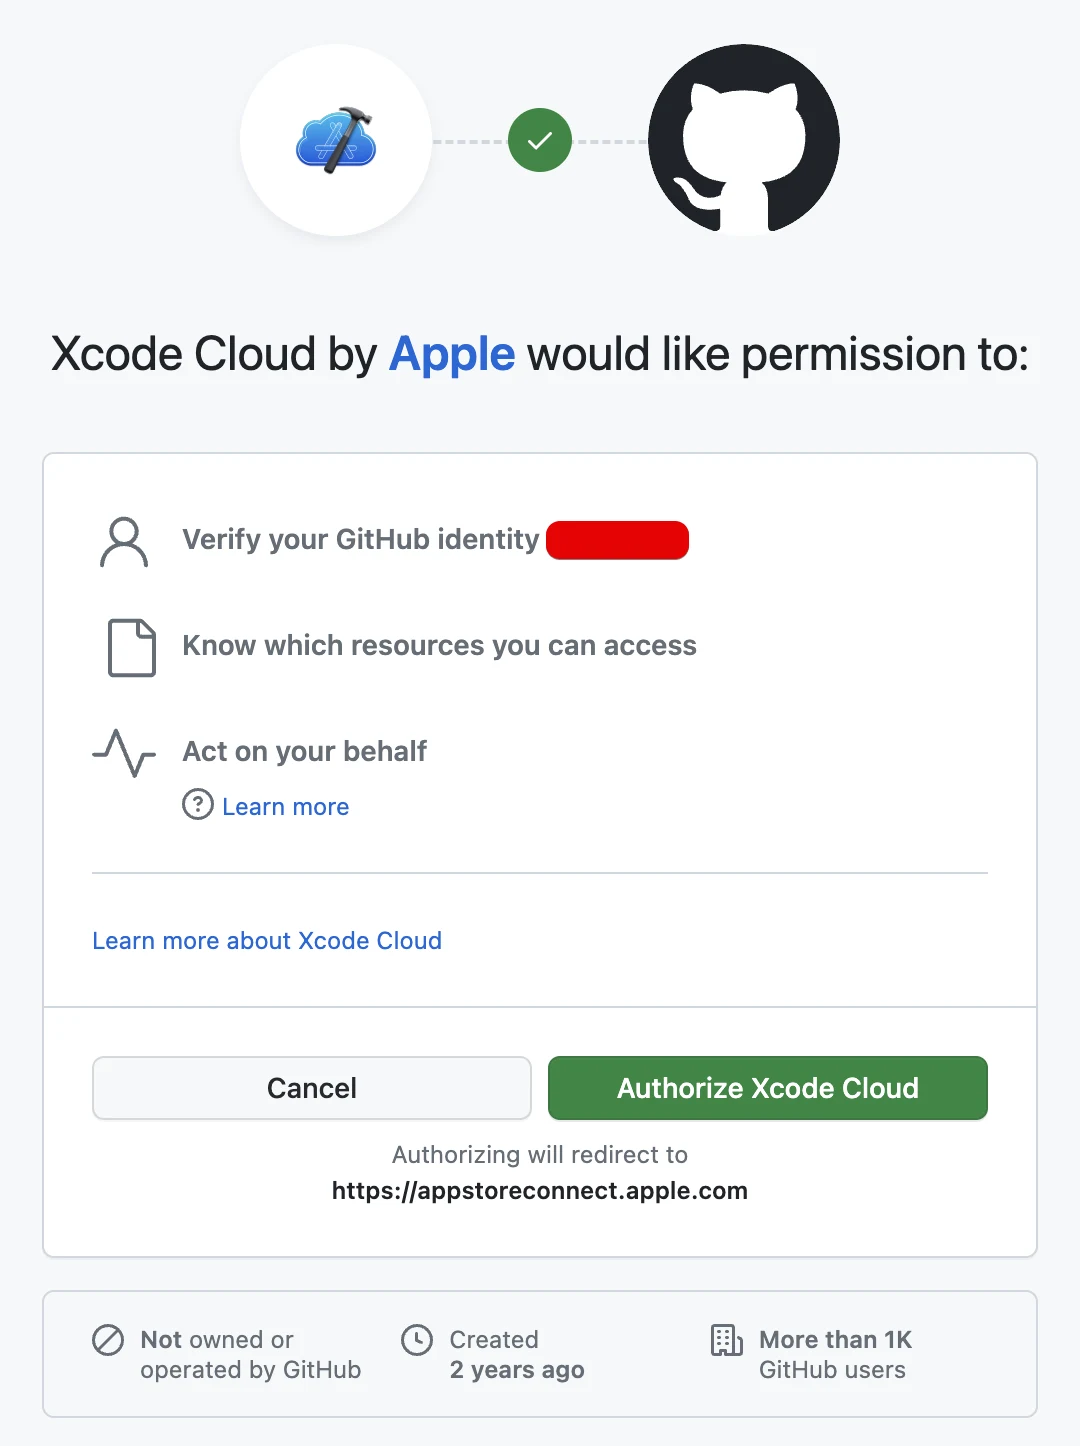
Next, you’re asked to authorize the Xcode Cloud app in your GitHub account. Click Authorize Xcode Cloud.
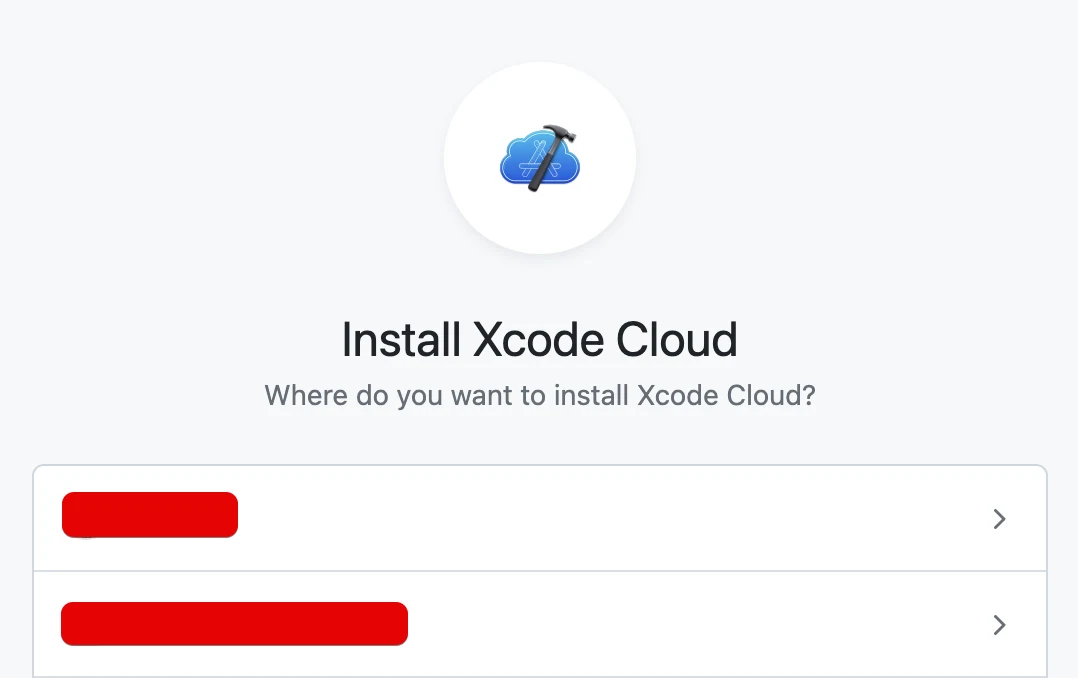
Then pick the account where Xcode Cloud should be installed.
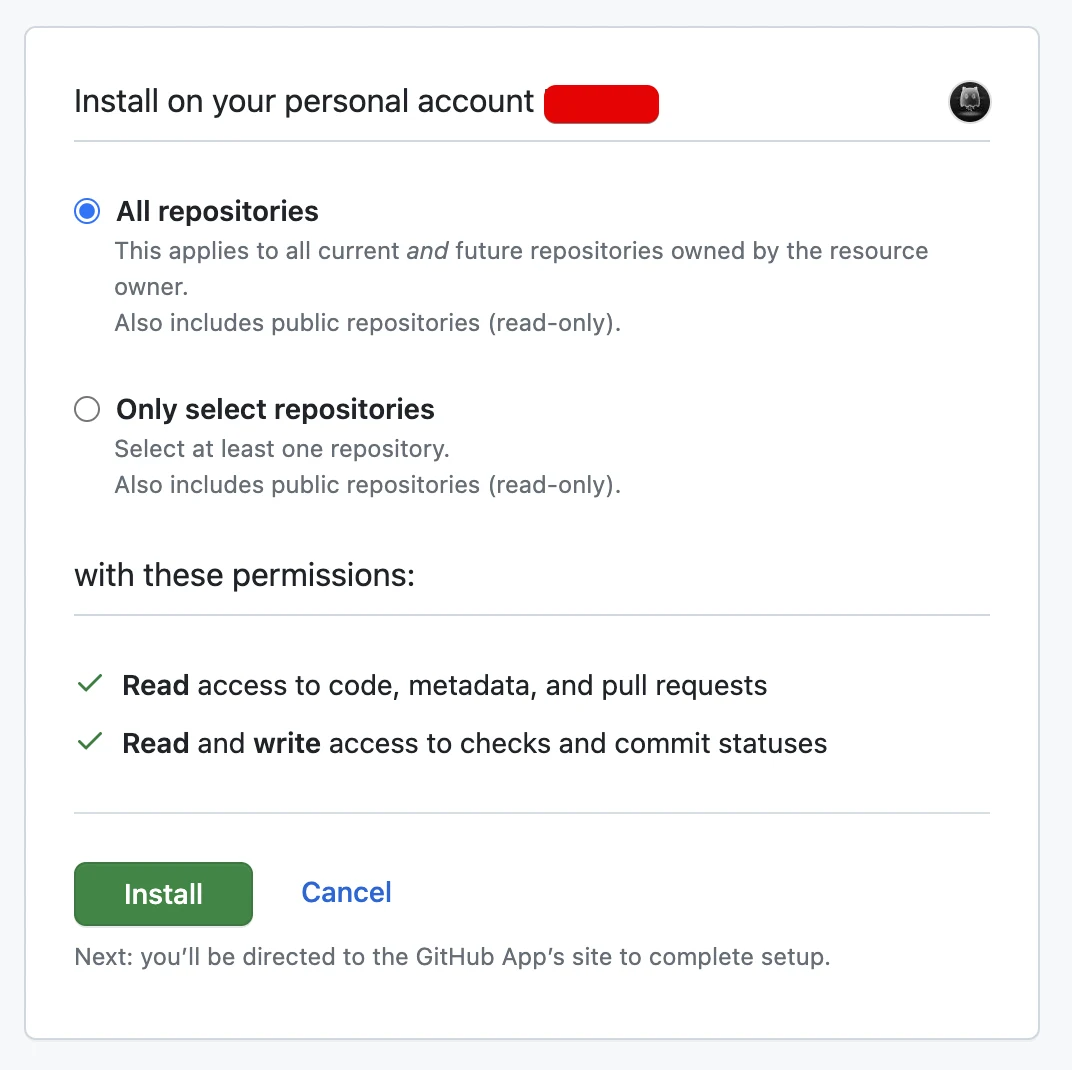
Finally, confirm the installation for all repositories.
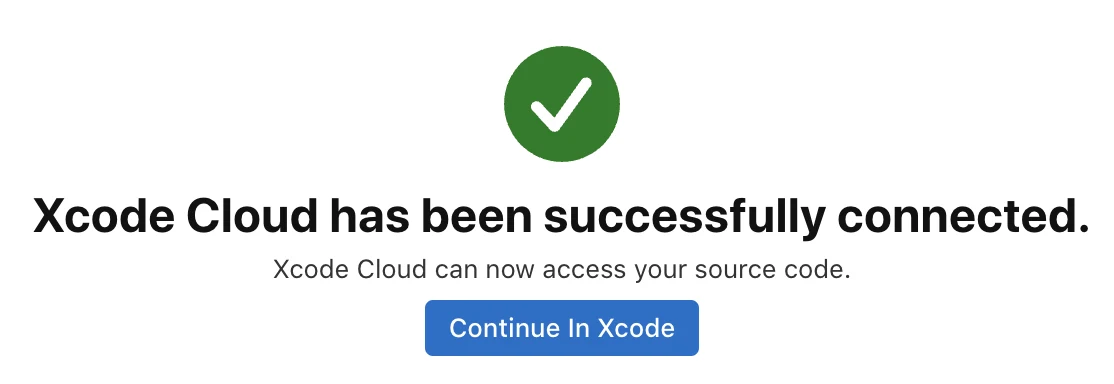
If you see this message, everything went well.
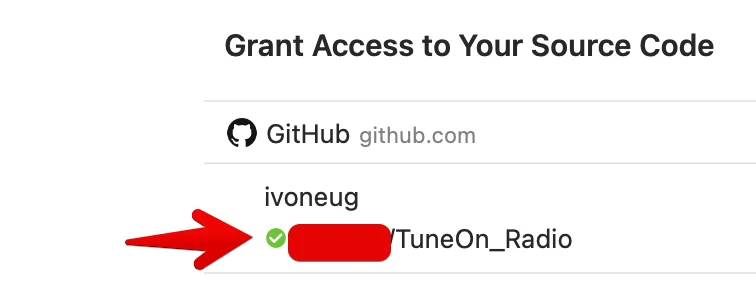
A green check mark next to the repository in Xcode means we’re good to go. Click Next.
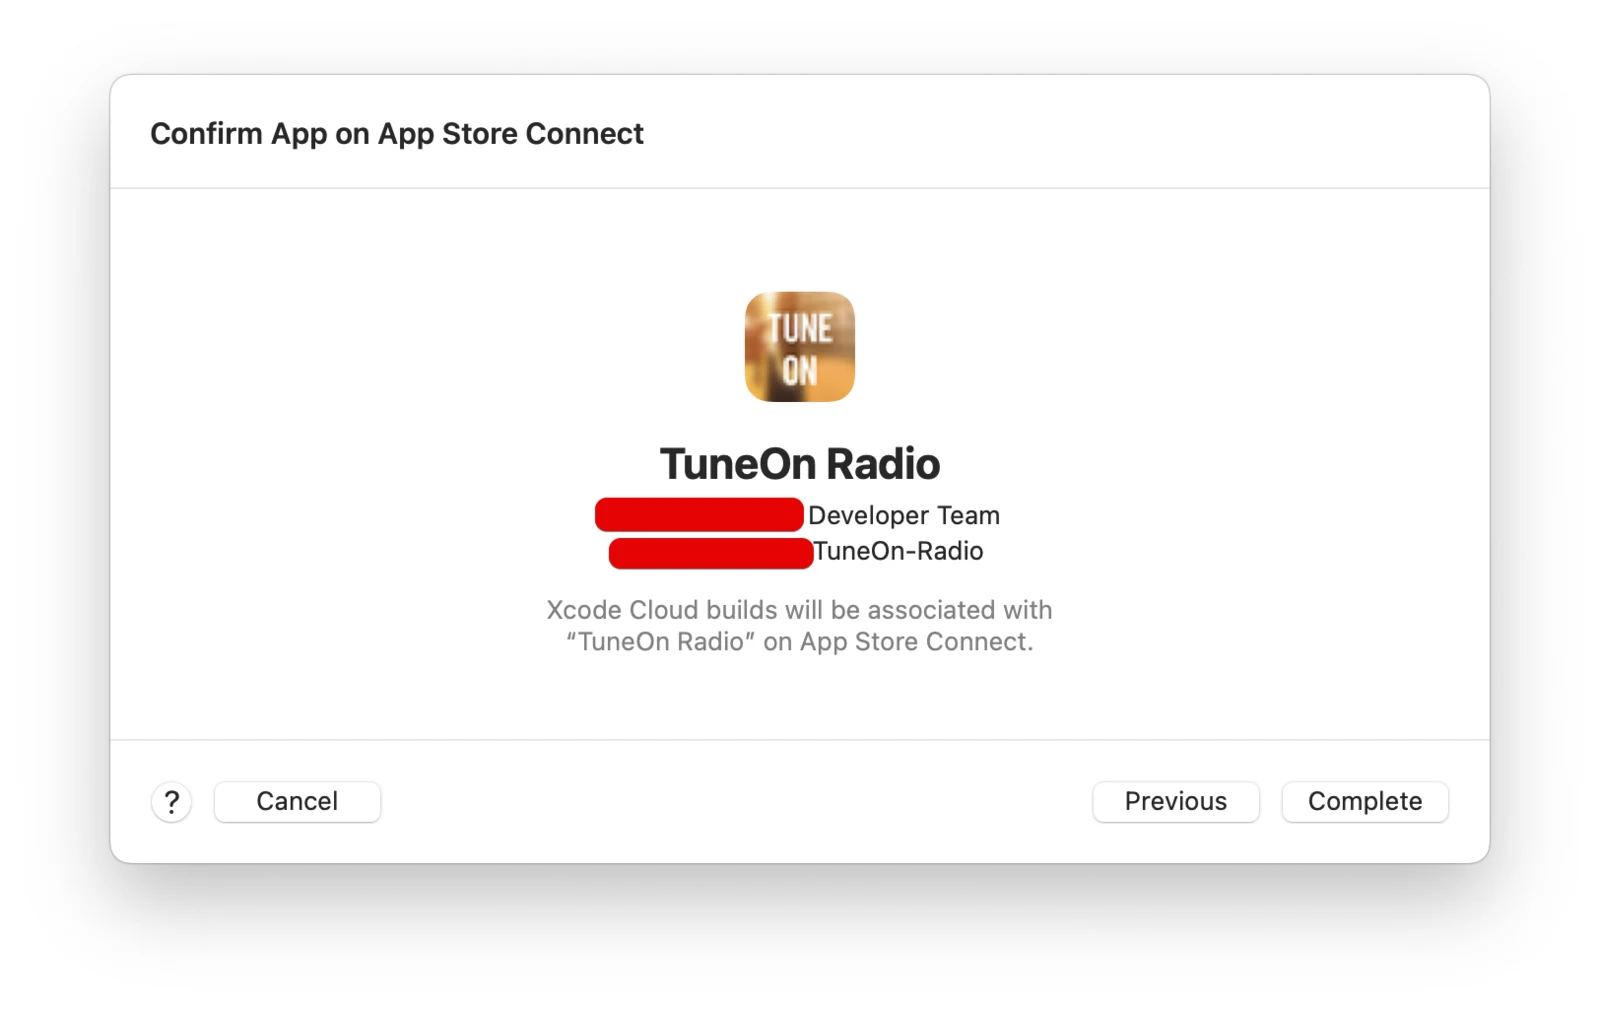
Next comes the screen that confirms the app record in App Store Connect. Click Complete.
The last screen lets you pick the branch XC will build.
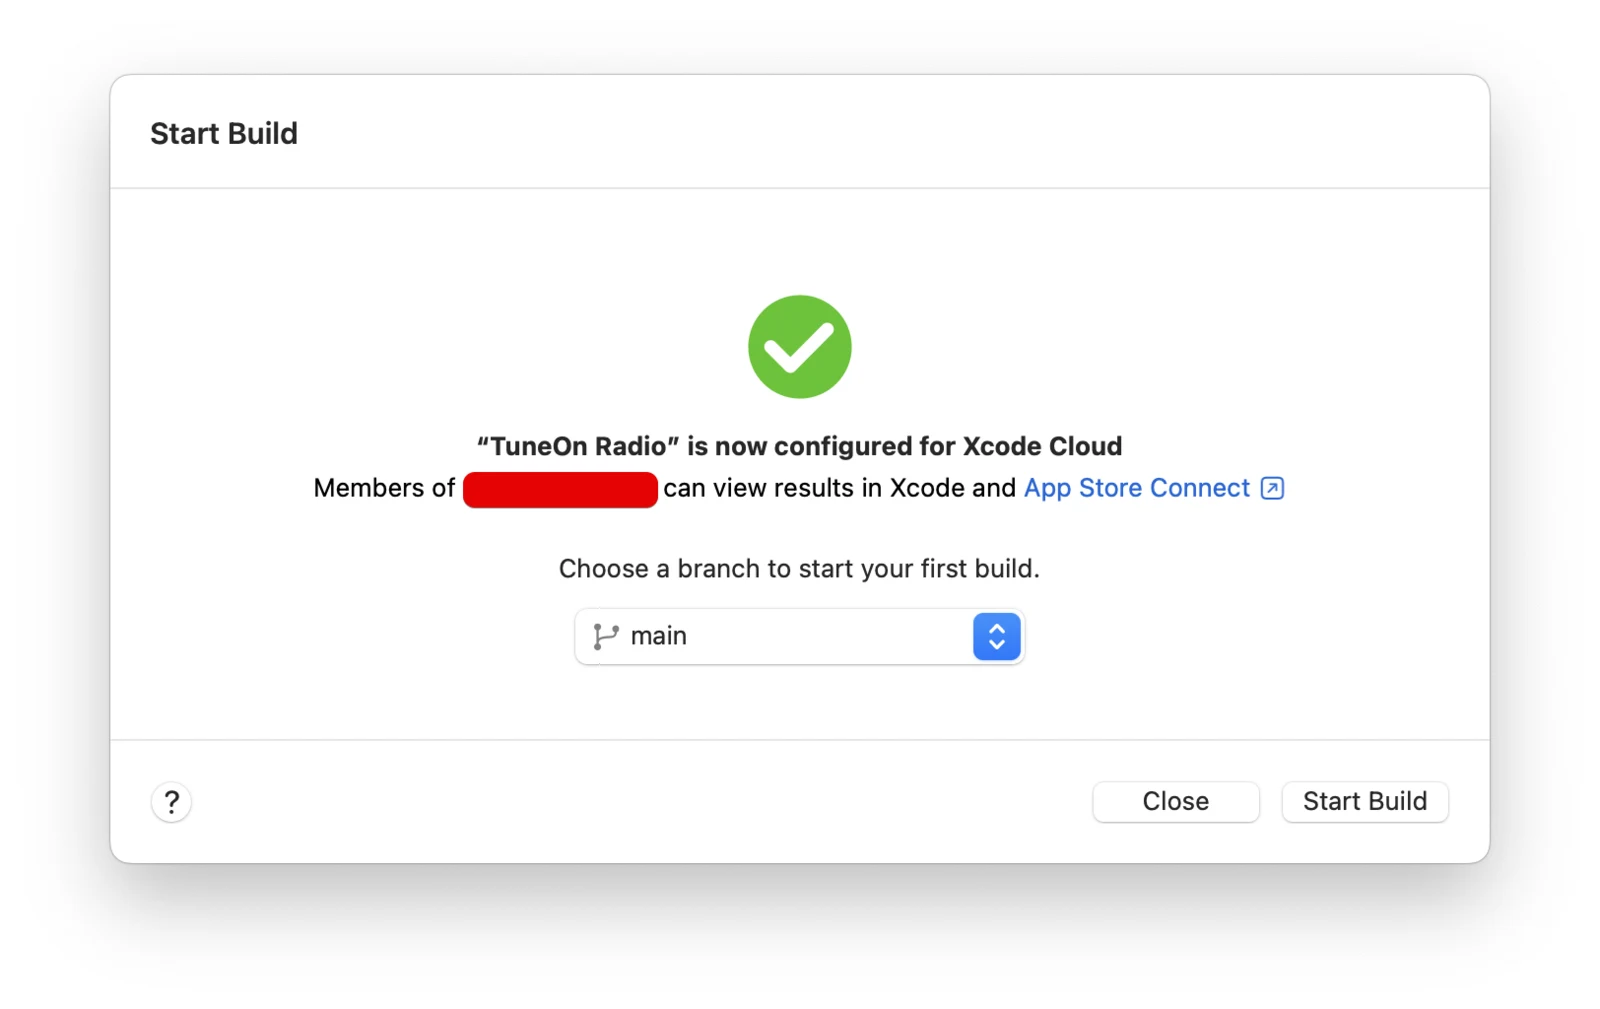
Click Start Build to run the first build of the app in the cloud.
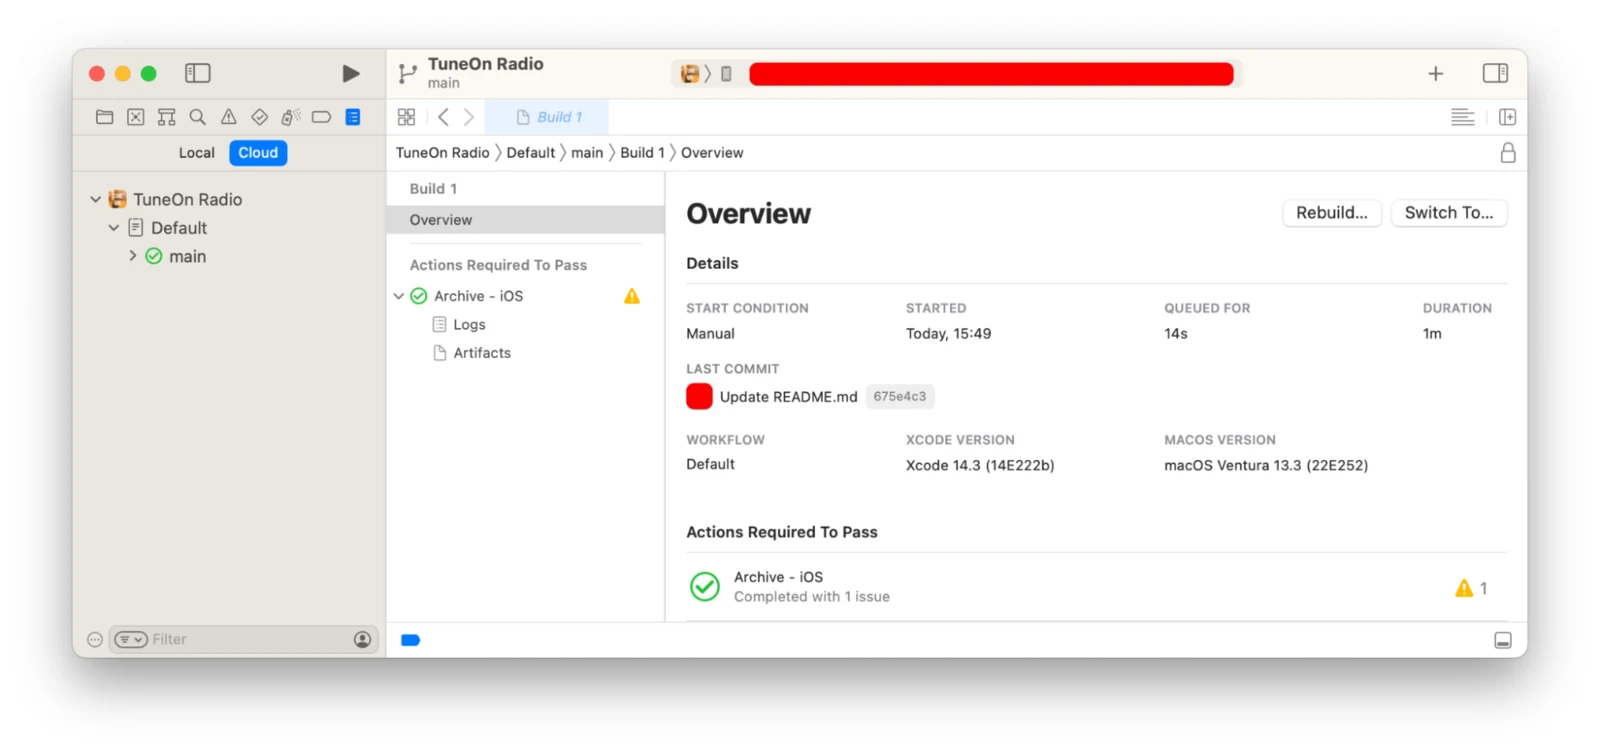
The build starts automatically, and you’ll see the screen of the current workflow, called Default. After a while the build finishes, Xcode Cloud sends you an email, and the result shows up in Xcode.
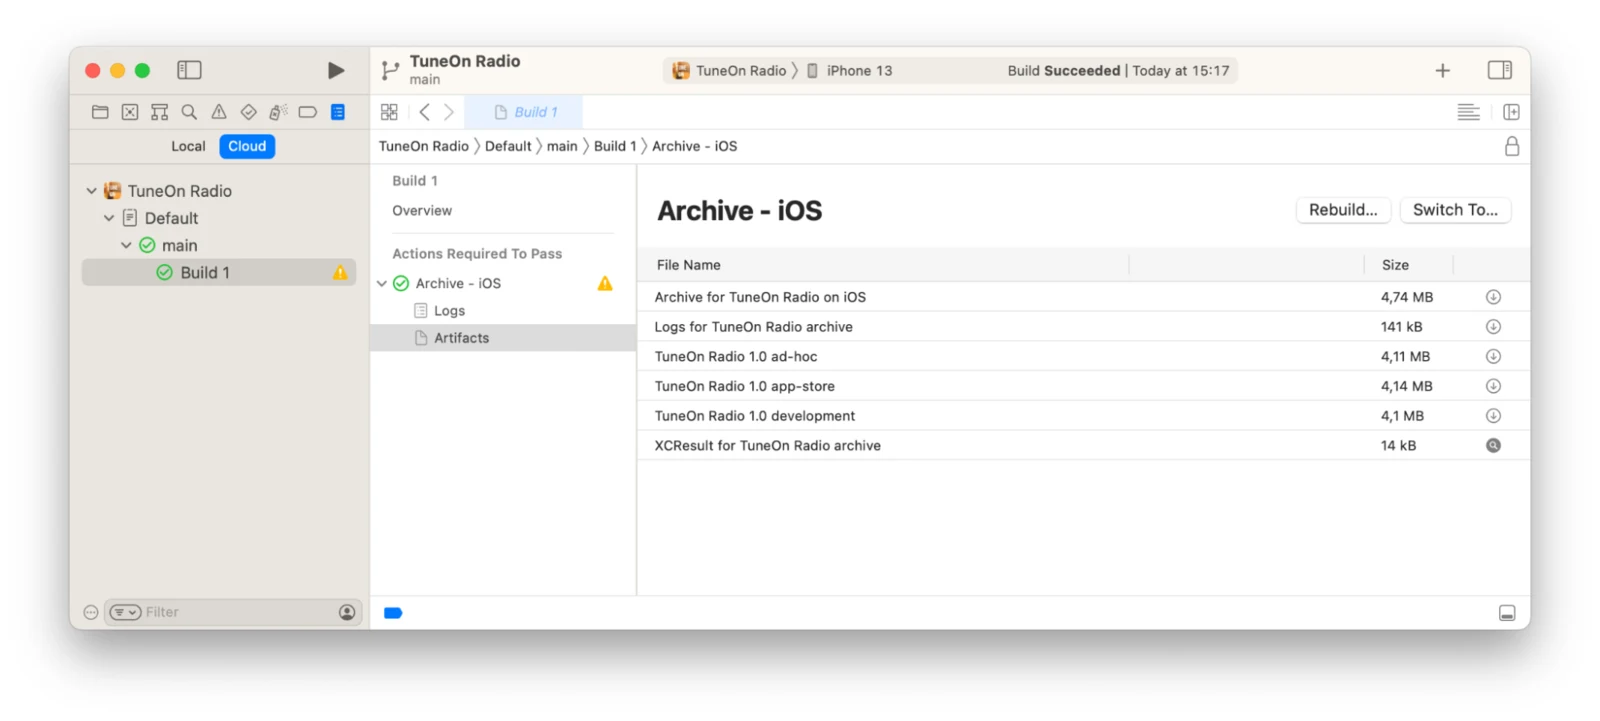
The artifacts of each build are available in a separate view.
Configuring a workflow
Now let’s edit the Default workflow. The editor looks like this:
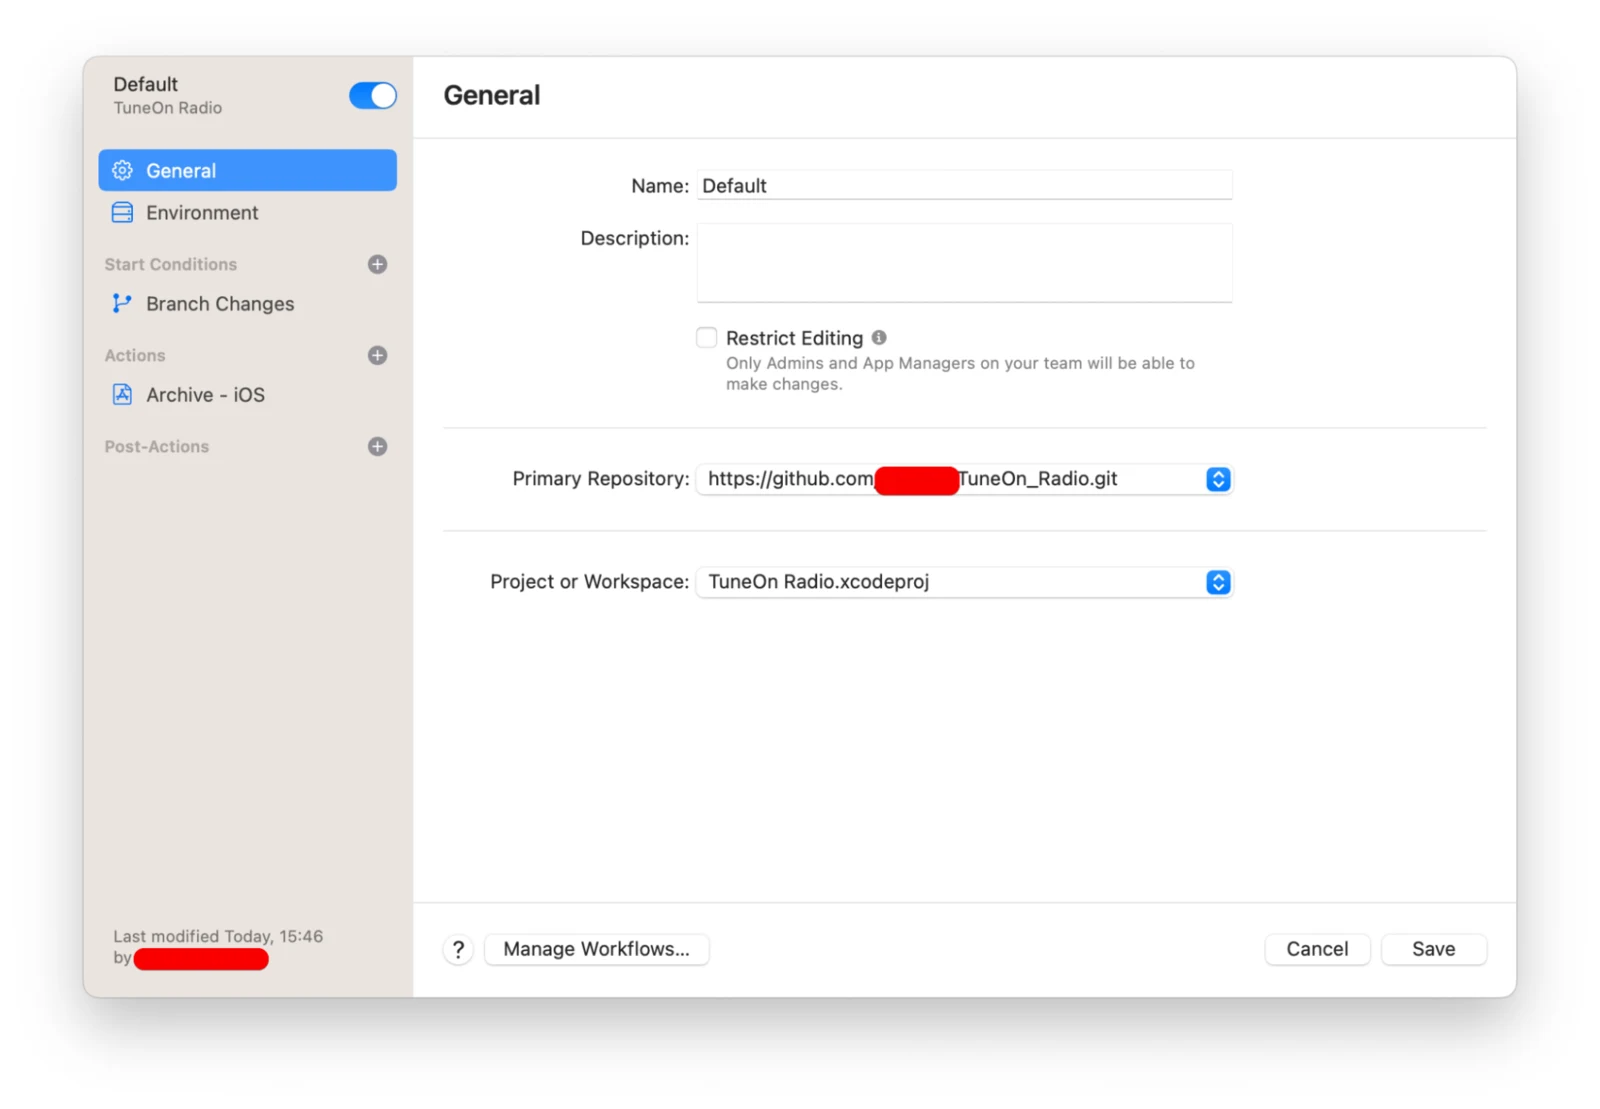
Here you can configure every aspect of the workflow. Let’s go through the sections one by one.
General holds the basic settings: the name, the description, the repository and the project or workspace to use. A couple of settings here deserve attention:
- Restrict Editing is essential for workflows that deploy builds to TestFlight or the App Store. Xcode Cloud won’t allow external deployment unless this box is checked.
- Project or Workspace matters if you use CocoaPods: you have to choose the workspace generated by CocoaPods here.
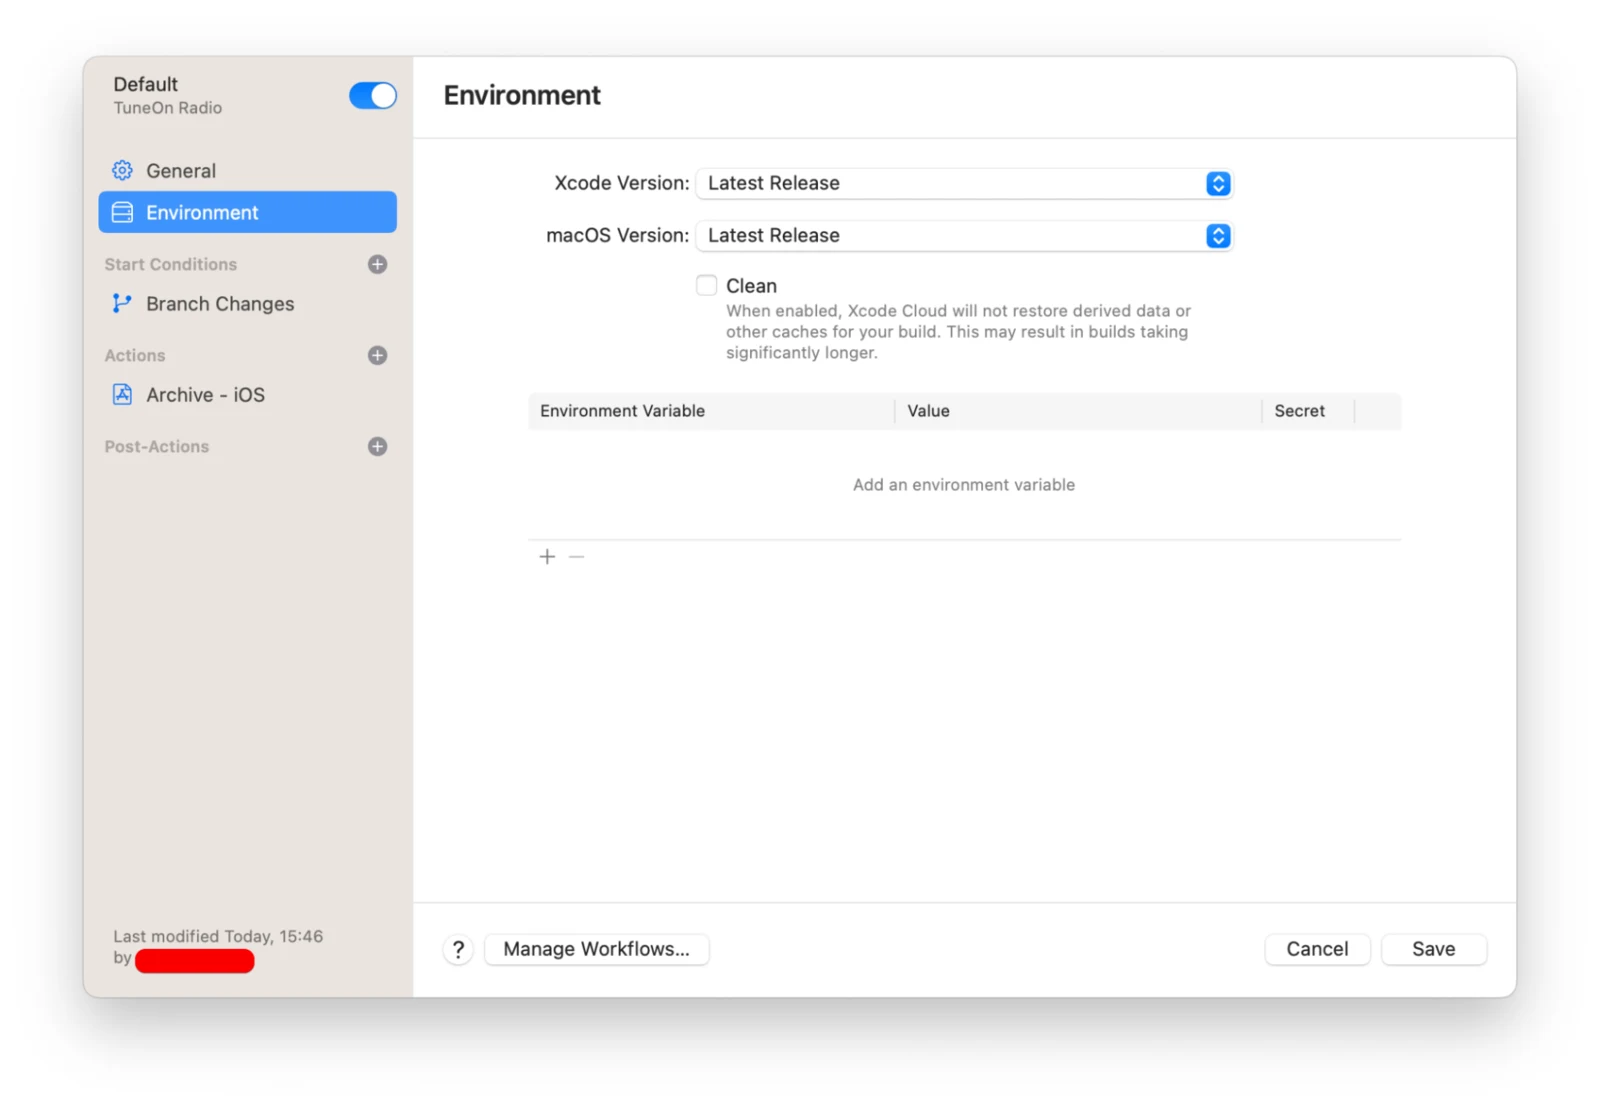
Environment configures the environment XC uses to build the project. Two settings are worth mentioning:
- Clean disables the cache for subsequent builds. Check it for workflows that ship the app to the App Store or TestFlight.
- Environment Variables lets you define environment variables you can use in your custom scripts and while XC runs.
Below these there are three more sections:
- Start Conditions
- Actions
- Post-Actions
They give you a lot of flexibility over the workflow and what it does.
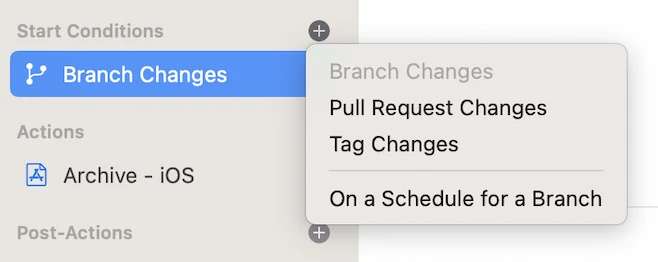
Start Conditions defines what triggers the workflow. Note that you can always start any workflow manually. So, if you want, you can create a start condition that never fires and run that workflow only by hand.
There are four types of start conditions:
- Branch Changes starts the workflow when any branch, or a selected one, changes. You can also add conditions, such as changes to a particular file.
- Pull Request Changes starts the workflow when a pull request is opened or updated. You can set the source and target branches too, for example to build only PRs that target
develop. - Tag Changes starts the workflow when a tag is created or changed. This is handy for building release tags automatically and sending them to TestFlight.
- On a Schedule for a Branch builds the selected branch on a schedule, for example for nightly builds.
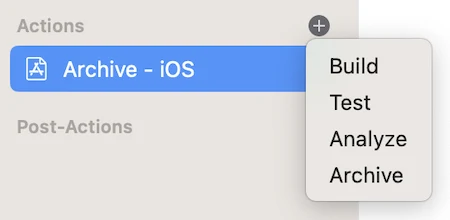
Actions defines what exactly Xcode Cloud does in this workflow.
- Build builds the app for the platform (iOS, macOS, tvOS or watchOS), scheme and destination (simulator or real device) you choose. Note that a single build action covers only one platform, but a workflow can have as many actions as you like. This way one workflow can build and test the app for every platform.
- Test tests the selected target on the selected platform. You can choose a group of devices or a specific device to test on, for example all iPhones, all iPads or just the iPhone 11. This action has one important setting:
- The Required radio button with two values, Required to Pass and Not Required to Pass. It controls whether the workflow fails when the tests fail.
- Analyze runs Xcode’s analysis tools on the build (configured the same way as Test).
- Archive creates an archive of the app. The key setting here is Deployment Preparation, which has these options:
- None: the archive can’t be released to TestFlight or the App Store.
- TestFlight (Internal Testing Only): the archive can only go to internal testers in TestFlight.
- TestFlight and App Store: a complete archive that can go to external testers and to the App Store.
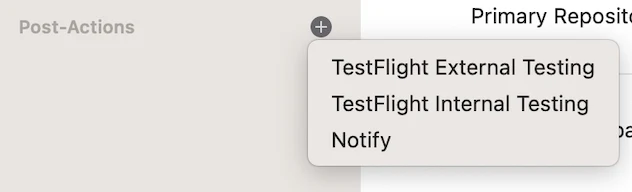
Post-Actions defines what happens after all actions have succeeded. There are three options:
- TestFlight External Testing sends the build to any number of external tester groups or individual testers in TestFlight. Groups and testers must be created in App Store Connect beforehand.
- TestFlight Internal Testing sends the build to internal testers in TestFlight (again, the groups must exist in App Store Connect).
- Notify sends an email or Slack notification with a custom condition, for example only when the build fails.
Customizing Xcode Cloud with shell scripts
Xcode Cloud lets you add your own shell scripts to extend the build. The diagram below shows the steps you can customize.

So you can add custom code at three points:
- after the repository is cloned,
- before the build,
- after the build.
It’s done the good old way: you create executable scripts with specific names in a special directory at the root of the project. To hook your script into the XC build:
- Create a
ci_scriptsdirectory at the root of the project. - Put the script you need there:
ci_post_clone.shruns after the repository is cloned;ci_pre_xcodebuild.shruns before the build;ci_post_xcodebuild.shruns after the build.
- Make sure the scripts are executable: don’t forget to run
chmod +x SCRIPT_NAMEfor each of them.
For example, here is a script that installs CocoaPods and installs the pods. It goes into ci_post_clone.sh:
#!/bin/sh
brew install cocoapods
pod install